
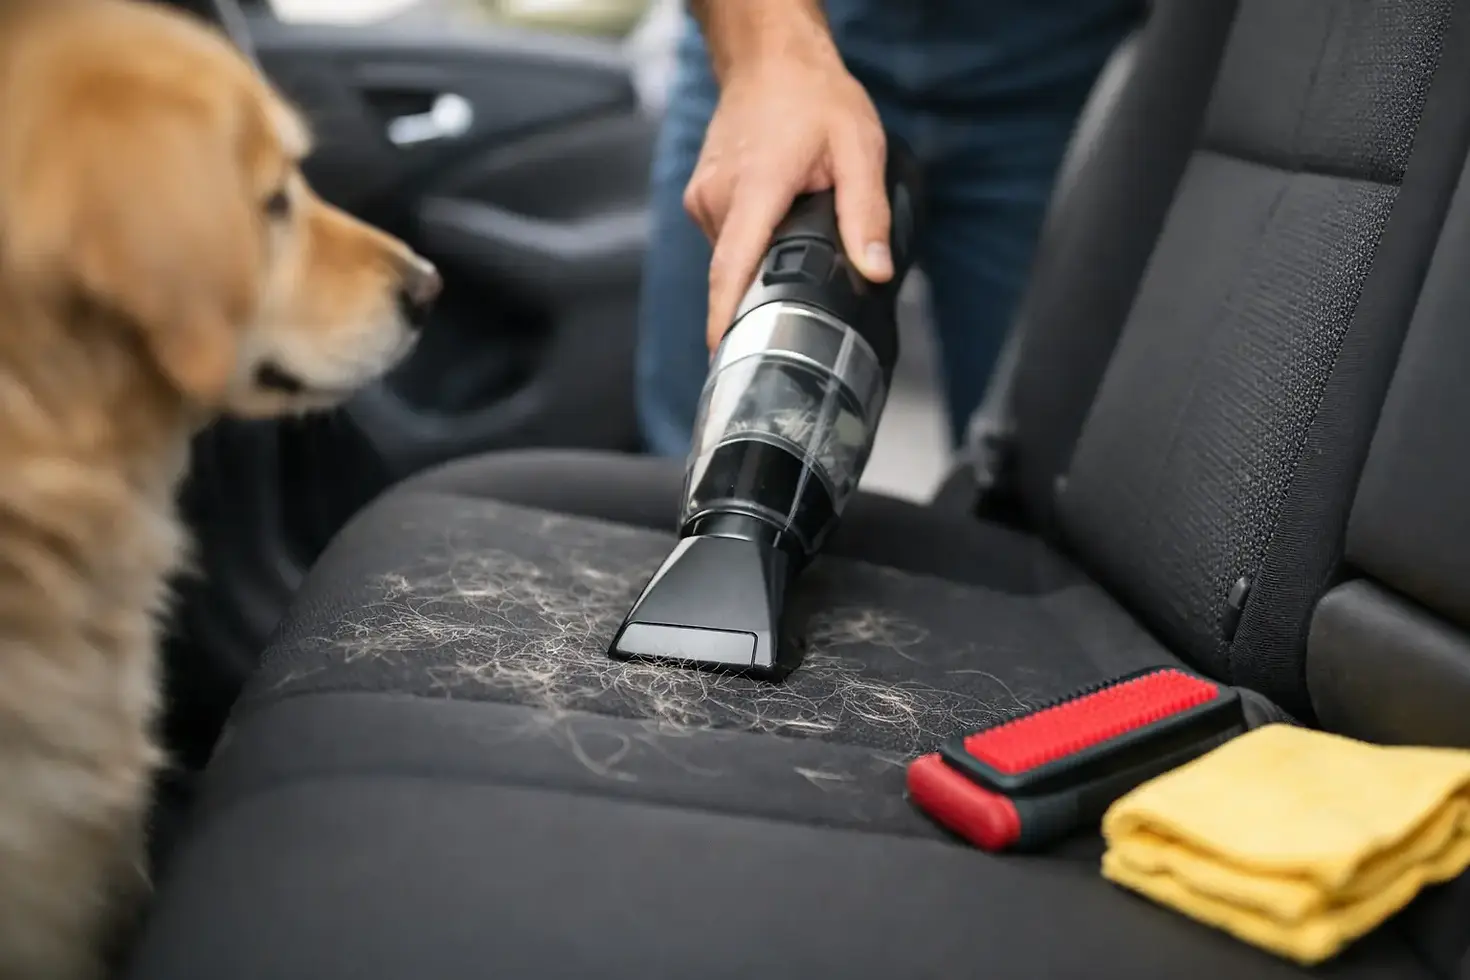
How to Remove Pet Hair From Car Seats

You vacuum the seats, step back, and the hair is still there - woven into the fabric, packed into the carpet, and clinging to every edge like it pays rent. If you are figuring out how to remove pet hair from car interiors, the frustrating part is not effort. It is using the wrong method for the way pet hair actually embeds itself into cloth, carpet, and cargo liners.
Pet hair is one of those detailing problems that looks simple until you are halfway through it. A quick vacuum might grab the loose stuff, but the stubborn hair usually stays buried in the fibers. That is why getting real results takes the right combination of friction, lift, and follow-up, not just more passes with the hose.
How to remove pet hair from car the right way
The best approach is to work in stages. You want to loosen the hair first, gather it into manageable clumps, and then vacuum it out completely. If you start with vacuuming alone, you will usually waste time and still leave hair behind.
Begin by removing floor mats, car seats covers if applicable, pet blankets, and anything else that traps loose fur. Open the doors for better light and access. If the interior is damp from weather or spills, let it dry first. Dry hair lifts better than wet hair, and a dry surface gives your tools more grip.
Next, choose your tool based on the material. Fabric seats and carpet respond well to rubber-based tools because they create friction that pulls embedded hair to the surface. Upholstery with tighter weaves may need a softer touch. Plastic trim and vinyl are usually easier and can often be wiped clean once the loose hair is lifted away.
Start with the tools that actually work
A standard household vacuum is helpful, but on its own it is rarely enough for heavy shedding. The most effective first-pass tools are a rubber pet hair brush, a detailing pumice-style block made for automotive carpet, or a nitrile or latex glove lightly dampened with water. Each one works by creating drag across the fibers so the hair releases and bunches together.
A rubber brush is usually the safest place to start. Use short, firm strokes in one direction on the seats and carpet. You will see the hair collect into lines or small piles. Once it is gathered, vacuum it up before moving to the next section. This keeps you from spreading it around again.
The damp glove trick works surprisingly well for light to moderate hair. Put on the glove, lightly dampen it, and run your hand across the fabric in steady strokes. The hair will cling to the glove and roll into clumps. This method is inexpensive and effective, but it is slower on larger jobs and not ideal for deeply packed carpet.
Pumice-style tools can be very effective on carpeted mats and cargo areas, especially when hair is packed in from repeated trips with dogs. The trade-off is that they can be too aggressive for delicate upholstery. Use them only on durable carpet and always test a small area first.
How to remove pet hair from car seats without damaging them
Car seats need a little more care than floor mats. Fabric seats can hold hair deep in the weave, but aggressive scrubbing can fuzz the material or make it look worn. Work section by section with a rubber brush or glove, using enough pressure to lift the hair without grinding it into the fabric.
If the seat has stitched seams, piping, or tight corners, use a crevice tool after brushing. Pet hair loves to collect along seam lines because static and pressure push it there. A detail brush can help tease it out before vacuuming.
For leather or coated leather seats, the hair itself is usually easier to remove, but it tends to gather in creases, under seat edges, and between the backrest and bottom cushion. In that case, a soft brush and vacuum combination works better than anything abrasive. You do not need heavy friction on leather. You need precision.
Carpets and mats are where the real battle usually is
Floor areas take the worst of it because shoes grind the hair deeper into the fibers. Add moisture, mud, and static, and the carpet starts holding onto everything. This is why mats should come out first. Once removed, you can shake them out, brush them aggressively, and vacuum both sides before putting them back.
For the installed carpet, work from the outer edges toward the center. Use your rubber tool to pull the hair into visible rows, then vacuum slowly with overlapping passes. Fast vacuuming leaves hair behind. Slow, controlled passes give the suction time to grab what has been loosened.
If you are dealing with a hatchback, SUV, or cargo area that regularly carries a dog, expect to repeat the process. Heavier hair buildup often takes two or three rounds before the carpet starts looking clean. That does not mean the method is failing. It means the hair has been compacted over time.
Static matters more than most people realize
One reason pet hair is hard to remove is static cling. Hair does not just sit on the surface. It attaches itself to fabric and synthetic trim. A lightly dampened glove or microfiber towel can help reduce static enough to lift loose hair more efficiently.
Dry air tends to make the problem worse, especially in colder months. If your interior feels like it snaps with static, a completely dry method may fight you the whole way. A small amount of moisture helps, but keep it controlled. You do not want to soak upholstery just to remove hair.
What not to do when removing pet hair
There are a few shortcuts that create more problems than they solve. The first is using overly aggressive tools on delicate interior materials. A stiff brush or the wrong stone can leave scratch marks, fuzzing, or wear spots that are harder to fix than the hair problem.
The second is oversaturating seats or carpet with water or cleaner. Hair removal is mostly mechanical. If you soak the fabric, you reduce friction and make vacuuming less effective. Too much moisture can also leave odors behind if the interior does not dry properly.
The third is stopping after the first pass. A car with regular pet transport usually needs repeated loosening and vacuuming. If you only do one round, the interior may look better for a minute but still feel hairy when someone sits down or runs a hand across the fabric.
When DIY works and when it does not
If the hair is light, recent, and mostly sitting on the surface, a rubber brush and vacuum can usually get you where you want to be. That is especially true if you stay on top of it and clean the vehicle regularly.
If the vehicle has months of buildup, deeply embedded hair, lingering pet odor, or stained fabric along with the shedding, it becomes a much bigger job. At that point, technique matters more, tools matter more, and the time required jumps quickly. This is where professional detailing earns its value. Thorough pet hair removal is labor-intensive, and getting it right takes patience.
For busy families and pet owners, that trade-off is pretty simple. You can spend your afternoon fighting hair out of every seam and carpet fiber, or you can have someone handle it properly at your home or workplace. That convenience matters when the goal is not just a cleaner car, but getting your time back too.
How to keep pet hair from taking over again
Once the hair is out, maintenance gets easier. Seat covers, pet hammocks, and washable cargo liners make a real difference because they catch the bulk of the shedding before it reaches the actual upholstery. Regular brush-outs for your dog help too, especially during high-shed seasons.
A quick vacuum once a week is far easier than a full hair-removal reset every couple of months. Even five minutes of maintenance keeps the hair from embedding deeply. If your pet rides often, keeping a rubber brush in the trunk is a smart move. A fast pass after a trip can prevent buildup before it becomes a full detailing issue.
At Jon Boyzzz Mobile Auto Detailing, we see this all the time with family vehicles, commuter cars, and SUVs that do double duty as pet taxis. The difference between a quick cleanup and a full restoration usually comes down to how long the hair has been left to settle in.
If you want the cleanest result, treat pet hair like any other stubborn detailing issue - use the right tool, use the right amount of pressure, and give the process enough time to work. A little patience goes a long way, and when the interior is finally clean, every drive feels better.

Comments